
How to Shoot Gorgeous Sparkler Photos (Two Ways)
- Jul 2, 2020
- 4 min read
Take gorgeous sparkler photos for Fourth of July with this how-to!
Before you read the rest of this guide:
#1: Grab PLENTY of sparklers. Not just one box.
You don't want to run out of sparklers for this experiment -- especially if you accidentally purchase a pack of duds.
#2: Prepare a bucket of water as a precaution.
Just in case the worst scenario occurs and someone's hair catches on fire -- please do have a plan. No brush fires, no singed hair, -- we just want to have a fun AND safe photo session.
#3: Remember! Sparklers are hot, and they shoot off sparks. Keep your lenses a healthy distance away, or use a UV filter to protect your glass.

How to Take Gorgeous Portraits with A Sparkler - Bright Lens Required
These are for portraits, with sparkler as a source of light BEFORE the sun goes down (as seen above). We recommend using a lens that is f/2.8 or wider as you want your images less "noisy" for a low-light portrait. Make sure your subject knows to keep as still as possible.

Note: If you do end up shooting portraits once the light is completely gone (dark), just be aware that the sparkler lights may not be enough to 'light up' your subject. Consider adding some ambient light (lantern/flashlight/outdoor patio light) to help keep your subject visible.
(Left image is a sample)
Step 1: In manual, open your aperture as wide as you can go and set your shutter speed to 1/125th of a second. You want your shutter speed to be faster as humans are not 'still' subjects, and if you aren't using a tripod, you are an additional moving element. Set your ISO to a starting point of ISO 800.
Step 2: Have your subject start the sparkler. Fire off a couple shots and ALWAYS remember to check your images. If the image is too dark, increase your shutter speed. If the image is too bright, decrease your shutter speed. If you find that your subject is too 'soft' and you want a deeper depth of field ('sharper image'), increase your aperture to a higher number (stop).
Keep in mind, the higher your ISO, the more grainy your images will appear. Technically you can try to shoot at a slower speed to compensate, if your image is too grainy, however, your images will start to show a bit of blur at 1/60th of a second.
Portrait Lenses that won't "break the bank":


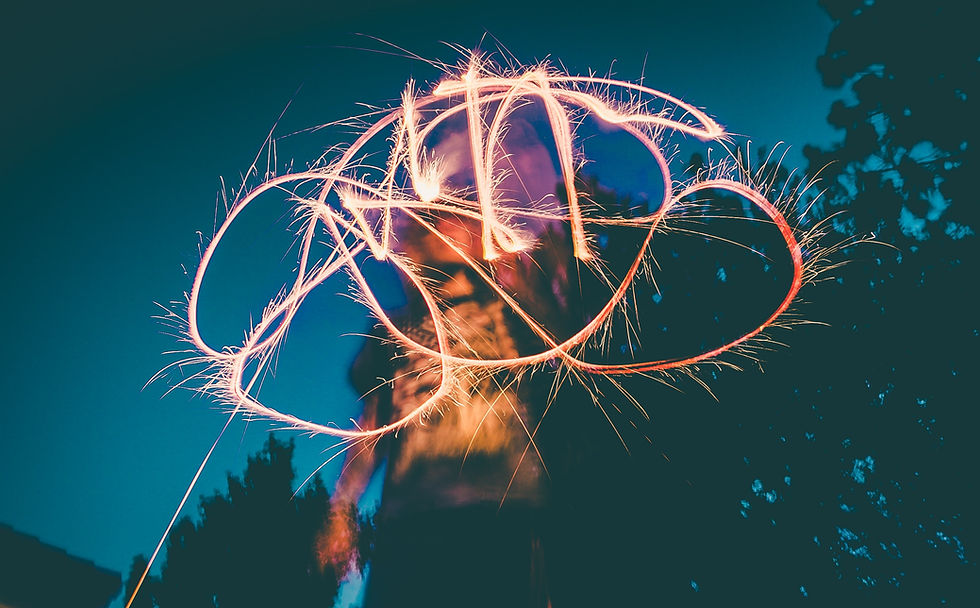
How to Draw/Write with a Sparkler - Tripod Required
For long(er) exposures, you will want to take these photos once the light is completely gone.
Step 1: Find a spot where your subject(s) have space to stand side by side. Try to keep your subjects lined up side-by-side, parallel to the camera.
Step 2: Figure out what you want to write or draw.
Keep in m
ind that when you write, you want to write backwards as the camera will be facing you. Have your subjects practice this a few times before you light any sparklers.
Step 3: Manually focus on the spot that the drawing/writing will be. You can do this by having the subject(s) turn on their phone flashlights/flashlights, and shine the light on themselves (face/chest). Zoom in on your live view to double check the sharpness.
Step 4: You can either set your camera to Shutter priority (initially) or Manual. Set your shutter speed to 8 seconds. Set the ISO to 100 (in shutter priority). Your camera will dictate aperture based on these settings. If shooting manual, use the same settings, but open your aperture to the 'widest' it can go.

Step 5: Set a two second timer (if you are not in the shot), set a 10 second timer if you need to run into place, or set a two second timer on your phone remote. Light your sparklers before the timer ends.
Step 6: Review your image. If your image comes out perfectly, you are set! If what you wrote out was not 'complete', add on more time to your shutter speed (10 seconds). If the timing was perfect, but the image is darker than what you want, increase your ISO (in this example, to 400 or 800).
Step 7: Take another test image (if the first one didn't turn out). By the second image, you should be able to figure out your settings perfectly with minor tweaks!
Tip: For more defined lines/drawings -- have your subjects repeat the motion of their lines to add more light to their 'light painting'.
Did you end up taking any gorgeous photos? Want to share them with us, or have us share them?
Thank you for reading our blog post ! If you are interested in seeing our new blog posts as we release them, don't forget to subscribe to our newsletter! This blog post is shareable on social media, so please do share if you found this useful.
The Shutterbug is a Oregon Family Owned & Operated Camera Store, with four locations in Oregon. We have been in the industry of helping photographers like you since 1971.


Comments